A vehicle’s cooling system works quietly in the background, yet it plays one of the most critical roles in engine health. Every mile driven creates heat, and without proper cooling, even the strongest engine can suffer serious damage.
Over time, coolant breaks down, rust forms inside passages, and debris begins to circulate through the radiator. When that buildup is ignored, cooling efficiency drops and temperatures rise faster than expected.
Flushing a radiator is not just about replacing old fluid. It is about clearing out contamination that blocks heat transfer and stresses components like the water pump, thermostat, and heater core. Many overheating problems begin with neglected coolant that has lost its protective qualities.
A radiator flush restores proper flow, improves temperature stability, and helps prevent corrosion inside the cooling system.
When done correctly, it extends engine life and improves reliability. With basic tools, patience, and attention to detail, this maintenance task can be completed safely and effectively, even outside a professional shop.
Table of Contents
What A Radiator Flush Does And Why It Is Important
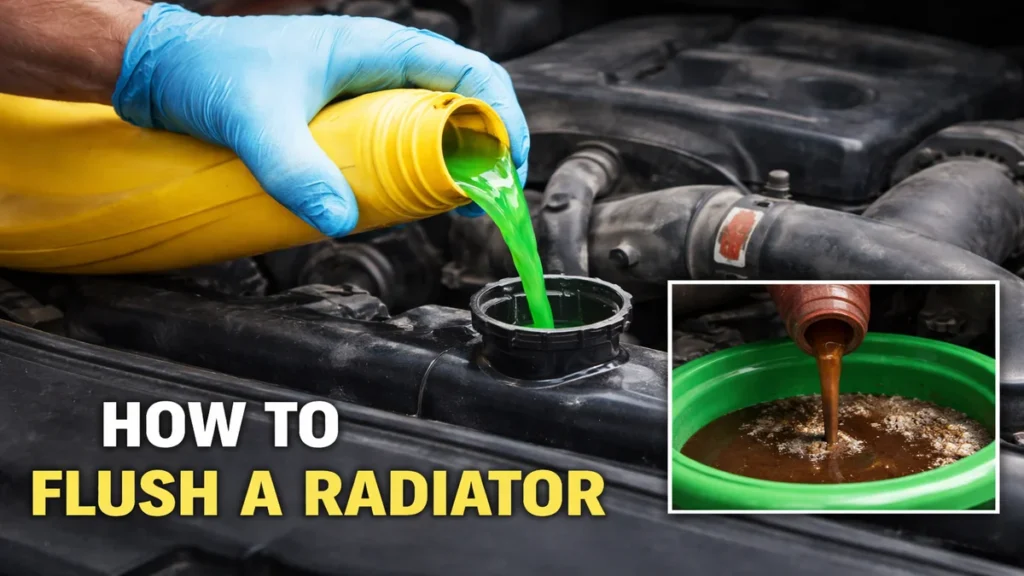
A radiator flush removes old coolant and contaminants that cannot be drained out through normal fluid replacement.
How Coolant Changes Over Time
Coolant is a mixture of antifreeze and water, blended with corrosion inhibitors. As it ages, heat and chemical reactions reduce its effectiveness.
Rust particles, scale, and mineral deposits begin to form inside the radiator and engine passages. These contaminants restrict flow and reduce heat transfer.
Difference Between Draining And Flushing
Draining removes only the coolant that flows out naturally. Large amounts of old fluid remain trapped inside the engine block and heater core.
Flushing uses clean water or a flushing agent to circulate through the system, pushing out debris and residue that draining alone cannot remove.
Problems Caused By Skipping Radiator Flushes
Neglected coolant can cause overheating, internal corrosion, heater performance loss, and premature water pump failure.
Rubber hoses and seals also degrade faster when exposed to contaminated fluid.
Tools, Supplies, And Preparation Before Flushing
Preparation ensures the process goes smoothly and safely.
Tools And Supplies Needed
Basic tools include a drain pan, gloves, safety glasses, and a wrench or pliers for hose clamps.
Fresh coolant, distilled water, and a radiator flush solution may also be required depending on system condition.
Choosing The Right Coolant
Vehicles use specific coolant types based on engine design and materials. Using the wrong type can cause chemical reactions and damage.
Always match the coolant to manufacturer recommendations and avoid mixing incompatible formulas.
Safety Precautions To Follow
Coolant becomes extremely hot during operation. Flushing should only be done when the engine is completely cool.
Antifreeze is toxic. Proper disposal is essential to protect people, pets, and the environment.
Step-By-Step Radiator Flushing Process
Following a structured process ensures effective cleaning without damaging components.
Step One: Cooling And Access Preparation
Allow the engine to cool fully. Open the hood and locate the radiator cap and drain valve.
Place a drain pan beneath the radiator to collect old coolant.
Step Two: Draining Old Coolant
Remove the radiator cap slowly to release pressure. Open the drain valve or disconnect the lower radiator hose.
Let the coolant drain completely into the pan. Close the drain valve or reconnect the hose securely.
Step Three: Adding Flush Solution Or Water
Pour radiator flush solution into the radiator if heavy buildup is suspected. Otherwise, distilled water alone may be sufficient.
Fill the radiator completely and reinstall the cap.
Step Four: Circulating The Flush
Start the engine and allow it to reach normal operating temperature. Turn the heater to its highest setting.
This opens the heater core, allowing flush fluid to circulate through the entire system.
Step Five: Draining The System Again
Turn off the engine and allow it to cool. Drain the system once more.
The fluid exiting the radiator should carry visible contaminants if buildup was present.
Step Six: Repeating If Necessary
If drained fluid appears dirty or discolored, repeat the flush with clean water until it runs clear.
Multiple cycles may be required for heavily neglected systems.
Refilling Coolant And Removing Air From The System
Proper refilling is just as important as flushing.
Mixing Coolant Correctly
Most vehicles require a fifty-fifty mixture of coolant and distilled water. Pre-mixed coolant eliminates guesswork.
Using distilled water prevents mineral deposits from forming inside the system.
Refilling The Radiator And Reservoir
Pour the coolant mixture slowly into the radiator until full. Fill the overflow reservoir to the indicated level.
Leave the radiator cap off during initial refilling.
Bleeding Air From The Cooling System
Air pockets reduce cooling efficiency and cause temperature spikes.
Start the engine and let it idle. As air escapes, coolant level may drop. Add more as needed until the level stabilizes.
Final Checks After Refill
Once air bubbles stop appearing, reinstall the radiator cap. Allow the engine to reach operating temperature and monitor the gauge.
Check for leaks around hoses and drain points.
Signs A Radiator Flush Was Successful
Correct flushing produces noticeable improvements.
Stable Engine Temperature
Temperature readings should remain steady during idle and driving.
Overheating symptoms often disappear after proper flushing.
Improved Heater Performance
Warm air output becomes more consistent when coolant flows freely through the heater core.
This is a common improvement after removing internal buildup.
Clean Coolant Appearance
Fresh coolant maintains a bright, clear color.
Cloudy or rusty fluid shortly after flushing may indicate deeper internal corrosion.
How Often A Radiator Should Be Flushed
Flush intervals depend on vehicle design, coolant type, and operating conditions.
Typical Service Intervals
Many vehicles benefit from flushing every two to five years.
High-mileage or heavy-use vehicles may require more frequent service.
Factors That Shorten Coolant Life
Extreme temperatures, towing, and frequent short trips accelerate coolant breakdown.
Poor-quality water or mixed coolant types also reduce effectiveness.
Common Mistakes To Avoid During A Radiator Flush
Avoiding these errors prevents costly damage.
Using Tap Water Instead Of Distilled
Tap water contains minerals that promote scale buildup inside the radiator.
Distilled water eliminates this risk.
Forgetting To Open The Heater Circuit
Leaving the heater off traps old coolant in the heater core.
Always run the heater during flushing.
Overtightening Drain Valves Or Hoses
Excessive force damages plastic fittings and seals.
Tighten connections securely but gently.
When A Professional Flush Is A Better Choice
Some situations call for professional equipment and expertise.
Severe Overheating Or Sludge Buildup
Heavy contamination may require pressurized flushing machines.
Professional service ensures complete removal without damaging components.
Cooling System Repairs Needed
Leaking radiators, failing thermostats, or damaged hoses should be addressed before flushing.
Flushing alone cannot fix mechanical failures.
Final Thoughts
Flushing a radiator is one of the most valuable maintenance tasks for preserving engine health. It restores cooling efficiency, protects internal components, and reduces the risk of overheating-related damage. While the process requires patience and care, it does not demand advanced mechanical skills.
Performing a thorough flush at proper intervals keeps coolant clean and system flow unrestricted. Combined with correct refilling and air bleeding, it helps the engine maintain stable temperatures under all conditions.
A clean cooling system reflects proactive maintenance. It supports reliability, efficiency, and long-term performance, ensuring the engine remains protected mile after mile.

- How Families in UAE Manage Changing Vehicle Needs - March 4, 2026
- How Many Axles On A Car And What They Do - March 2, 2026
- Metal Shavings In Oil Causes And What It Means - March 2, 2026